Monday, December 17, 2007

Holiday Knitting 2007

I realize that I haven't been updating lately, but I have two very good reasons. Really.

First is that I've been doing a lot of knitting. As in, most of my holiday gift knitting. Last year, I was smart enough to start knitting in September, so that when NaNoWriMo came along (not that I'd actually planned that far in advance, but never mind) I had time to do both. This year, I wasn't nearly as smart, and found myself starting my holiday knitting over Thanksgiving.

Of course, there is a difference between this year's knitting and last year's. Last year, I made several pairs of socks, a lace scarf, and a Clapotis. This year? Hats. Lots of hats.

The good news is that my family seems to appreciate knitted hats. And I happen to think that they make good gifts because they're the kind of thing that the recipient will actually wear, especially considering that all the people for whom I knitted hats this year will be going to Wyoming to ski right after the holidays. So, I knitted all of them using a basic 2 x 2 ribbed watchcap formula. I make them fairly long, usually 11 to 12 inches of ribbing, so that they can be folded up around the ears for extra warmth. I then decrease fairly rapidly for the crown, and voila! A nice gift.

The other reason for not posting is that many of the people who will be receiving said gifts read this blog. And, okay, now they might have some idea that they might, perhaps, be getting a hat this year, but at this point it's not much of a secret, considering how much frantic hat knitting I was doing at Thanksgiving. Still, I won't be posting the pictures until afterwards, because I want to leave some mystery about the color and so on.

The good news is that I am, in fact, done. I finished the last hat on Friday, so any other knitting that I get done will be a bonus. And the first thing on my bonus knitting list is a sweater for my daughter. I have been a crappy knitting mommy because I haven't yet made her one at any point in the last five years, but I really, really wanted her to have a nice wool sweater for her first skiing experience.

I'm using a pattern from Cabin Fever's Top Down For Toddlers, and I now feel doubly guilty for not having done one before because it's so easy. I started it on Friday, knitted a lot on Saturday, and now (Monday) have 10 of the 13 body inches done. I'm working it at a slightly larger gauge than the one called for (5 stitches to the inch instead of 5.5), which means that I'm working the pattern for a size smaller than what I actually need, which means that I'm doing a wee bit less knitting than I might otherwise have to.

I have also made a serendipitous discovery, which is more or less what inspired me to make a post today. I had 16-inch and 32-inch 3.75mm needles, but the body of the sweater is only 28 inches around. Not wanting to have to stretch the body around my 32-inch needles, I bought a pair of 24-inch needles. The only 24-inch Addi needles available were Addi lace needles, and I figured it wouldn't make much difference.

I was wrong.

The Addi lace needles were the best thing I could have ever bought for this project.

The sweater is cabled, and for years now I've been working my cables without a cable needle. Instead, I slip stitches from my working needles and pick them back up to rearrange the stitches. This means that I do a lot of delicate maneuvering with my needles, slipping the needles into stitches out of working order, dropping stitches and picking them back up, etc. The lace tips are amazingly good for this. They're pointy and tapered, perfect for slipping into stitches and picking up newly-dropped ones.

I also love working with the brass. For years, I've only used nickel-plated needles because anything else feels like I'm knitting with sandpaper, but the brass has been a pleasant surprise. It's not quite as slick as the nickel, but it's still well within my parameters for fast and fun knitting. The real joy, though, is the smooth-oiled feel to the way the needles rub together. It's made knitting with them a genuine pleasure.

The only drawback is that I can't hold the needles as close to the tips as I normally do, seeing as the tips are significantly longer, but that's been a very minor adjustment. Overall, I've been quite impressed with the Addi lace, and I think I'll have to look into investing in a few pairs for my actual lace knitting.

Yeah, probably should have asked for a Patternworks gift certificate for Christmas...

Labels: ,

Tuesday, October 09, 2007

Cathedral Mittens--One (Almost) Down

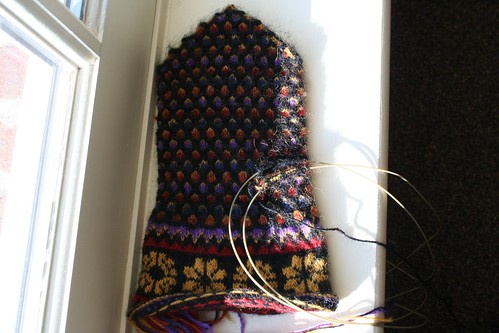
Cathedral Mittens

After a pause for bronchitis, I started in on the Cathedral Mittens again. I got all the way to the end of the first mitten, and all I have to do now is the thumb.

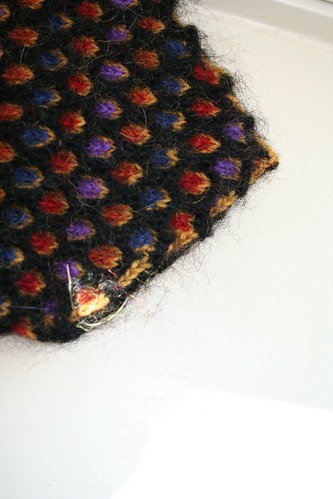
Cathedral Mittens--Detail

The decreases caused some thought and planning. I caught on pretty quick that the instructions would leave a very nice gold-black-gold three-stitch symmetrical border at the decreases. This worked great for the window pattern rows. Where it didn't work so great were the two black rows in between the window pattern. I concluded, after some squinting at my crappy black and white photocopy of the pattern (because, yes, I forgot to check while I was home and in the same room as the book), that the black rows didn't include the gold stitch. Which is fine with me, because it was enough of a pain to carry the black all the way across the row for two--count them two--stitches per round.

I'm still really pleased with how these are turning out. They're going much faster than I had ever imagined, bronchitis aside, and they're truly beautiful. I'm amazed at the work that went into developing this pattern.

Labels: ,

Saturday, September 08, 2007

Cathedral Mittens in Progress

I'm still composing my DragonCon report, so instead I'm going to talk about mittens.

Cathedral Mittens--In Progress

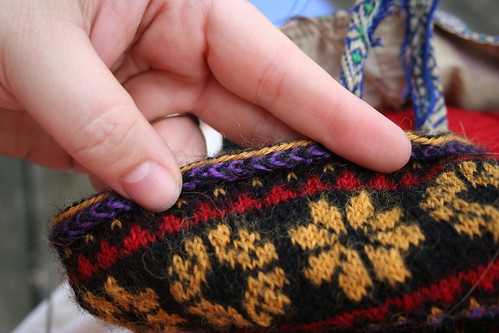
I'm really, really pleased with the way these are turning out. I was worried for a while about the gauge, because the swatch is measured over the palm stitch, and the cuff stitch is a lot wider. I was knitting on these huge cuffs thinking the things would swallow my hand, but now that I've gotten an inch above the thumb I'm thinking it's going to be okay. The hand stitch is, as my swatch told me, a lot more compressed horizontally than the cuffs, and the contrast is going to give a nice gauntlet effect to the cuff.

Cathedral Mittens--In Progress

I had to rip back a row when I first made the thumb opening, but so far that's only my second big mistake. My first big mistake, you ask?

Imagine, if you will, the purple and gold chevron pattern at the top of the cuff with the last row of gold stitches offset by half a repeat. It was actually a very nice effect, and if I had done it for the whole row I would have gladly kept it because it was pretty. Unfortunately, I did half the row correctly, and the other half not.

I had already knitted another two or three rows by the time I discovered this. I didn't want to rip out, so what I did instead was to slip stitches along the row until I reached the point above an incorrect stitch. I laddered down, then, using a crochet hook, snagged the correct color that was already stranded across the back of the work and knitted the column back up. It worked out fine, since the colors were already stranded, just in a different order than they should have been. I really should have taken pictures of the process, though.

These are also knitting up a good deal quicker than I thought they would. So far it's taken about four knitting days to reach the point where I am now, and the pattern is very easy to remember after the first repeat. It's going to take some time, but not nearly as much as I had feared.

Labels: ,

Thursday, August 30, 2007

Fifteen Years Later...

Because I have nothing else to do today, such as get dressed, finish packing, help daughter do same, and drive to Atlanta, I'm going to talk a bit about my new knitting project.

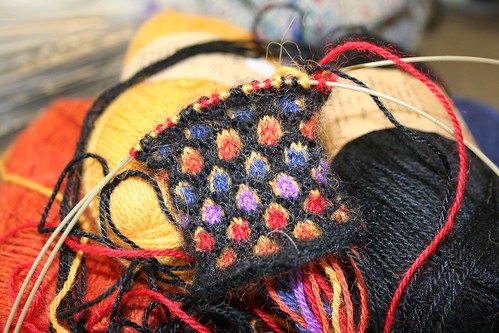
Cathedral Mittens

I've wanted to do Lizbeth Upitis's Cathedral Mittens for fifteen years. I've been making projects out of the book Homespun Handknit for at least that long, and the Cathedral Mittens were one of the ones that had to wait a while. Thanks to Maggie Righetti's Dumb Baby Bonnet, Stupid Baby Sweater, and Baby Booties, I did have a good basic skill set, but the Cathedral Mittens were completely out of my league. Furthermore, I didn't even have access to needles small enough to knit at twelve stitches to the inch, and if I had I didn't have access to good enough yarn, either. So the mittens waited.

As the years passed, I got better at knitting, and from time to time I'd look at the Cathedral Mittens and think, "Yeah, I could probably do those now." But there was always something else to do before tackling such a finely knitted project that would be only for myself. I had, apparently, a lot of selfless knitting to get through first. And I still hadn't found any yarn that said, "Hey, remember the Cathedral Mittens? Use me!" For one thing, I really wanted to do the mittens in the actual colors from the original pattern--which I rarely do--and finding a fine yarn in just the right shades of gold, purple, blue, orange, and red that also came in black proved harder than it might seem.

A few months ago, though, events converged. I'd added 000 and 0 size needles to my tools some time ago, and had knitted a couple of projects at twelve and ten stitches to the inch, so I knew I had the dogged bloody-mindedness required. Not to mention the insanity of the 160-fish fish blanket. Then I spotted some Garnstudio Drops Alpaca black, gold, and other cathedral-esque colors, and my brain finally dredged up "Cathedral Mittens!"

The picture above is my gauge swatch, knitted first on 000 needles, then 0s. The 000s gave me a gauge of about fourteen to the inch, so I switched to 0s. The gauge was a little closer, thirteen stitches per inch, and the "windows" opened up a lot more. 0s it was. I didn't want to go any bigger on the needle size because I wanted the stitches to remain fairly dense, and the Drops Alpaca isn't as tight, I suspect, as the original yarn.

According to the math of the original pattern, the gloves are about seven inches around. I need about eight and a quarter inches. The gauge is calculated based on the stitch pattern for the hand, which calls for slip stitches that compress the work a lot more than normal stranding. The cuff is worked with stranded knitting, and there's a big, big difference in the gauge. The mittens will be the correct size around the palm--well, theoretically--but the cuffs are huge. Seriously, they're going to be something like ten-plus inches

Now, it's possible that these mittens are supposed to have huge, gauntlet-esque cuffs, but it's difficult to tell from the pictures. The cuffs do look bigger, but I'm not sure they're that much bigger. Or that I want them that much bigger, even if that's how they're supposed to be. It's also possible that I'm the loosest stranded knitter on the planet and most normal humans wouldn't have such a huge difference in gauges. I've considered dropping down a couple of needle sizes for the cuffs, but I'll probably have to knit the whole cuff and some of the hand before I know for sure if I want to rip it all out and go with smaller needles.

I'm also waiting to make a decision about the thumb. The pattern uses a gore-less thumb, which is understandable given the colorwork, but I'm not horribly fond of them. To change it would require a lot of work, and I'm not sure it would turn out looking anything but a mess. But, as I said, I've got some knitting to go before I get there.

Labels: , ,

Wednesday, August 29, 2007

Sensational Socks!

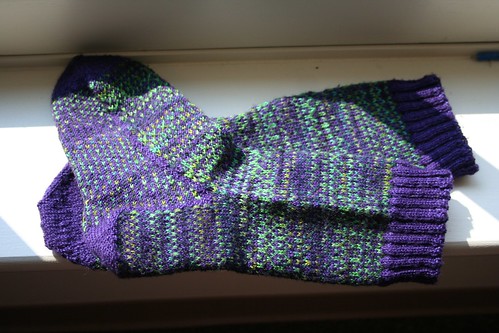
Sensational Koigu Socks

Pattern: Based on the "Pine and Neon" Four-Stitch Reticulated Patterns socks from Sensational Knitted Socks by Charlene Schurch.
Yarn: 3 skeins Koigu KPPPM/KPM (100% wool). 2 skeins KPM 7160 (Purple), 1 skein KPPPM 841 (Greens and Black)
Needles: 2.5mm (US 1)
Gauge: 19 sts x 21 rows = 2 inches over stranded stockinette
Knitting Time and Date Completed: 4 weeks, completed 08/27/07
Notes: There were two things that I'd wanted to do for a long time: Try Koigu, and knit some patterned socks. This project from Sensational Knitted Socks was just the thing to satisfy both desires. I love purple and green, and the moment I spotted these two colors I knew what I wanted to do with them. This was my first experience with Koigu, and I understand now why people rave about it. It's lovely to knit with, soft and springy, and even the solids in plain stockinette create all manner of interesting textures. It was a joy to work with, and I was sorry to reach the end of the project.

Sensational Koigu Socks

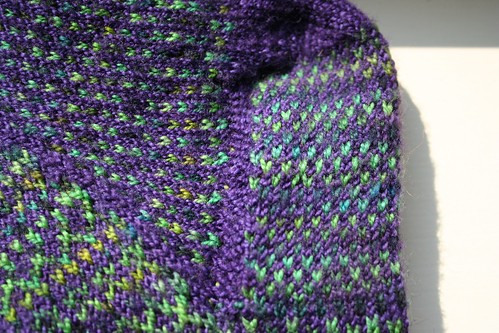
As always with any technique I've not tried before, these were a learning experience. I'd done stranded work, so the knitting part wasn't difficult. But I'd never done colorwork with a variegated yarn before and I made a basic mistake when I picked my colors, namely that the variegated yarn contained some colors that were as dark as the main solid. This meant that part of the pattern would be lost when the contrast yarn matched the solid yarn. I considered choosing another color, but I really liked the way the green and purple looked together and decided that I could live with some pattern blurring. It turned out to a be a good decision. Yes, some of the pattern fades into the background, and it's not an effect that everyone would find pleasing, but I love the two yarns together so much that I find that I don't really care.

Sensational Koigu Socks

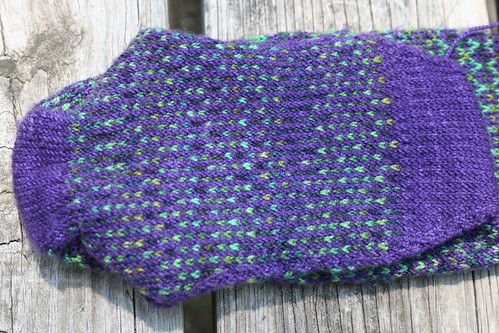
The second learning experience involved the heel turning. Because of the colorwork, the entire sock is knitted with two strands of yarn, with the exception of the heel turning and the toe. I didn't really think about it while I was turning the heel, but once I started on the foot I realized that the bottom of the heel, knitted with only one color and one strand, was a very different thickness and texture than the rest of the sock. Since this isn't an area that typically wears out on my socks, I decided I wouldn't worry about it, but when I got to the toe I simply dropped the contrast yarn and picked up a second strand of the solid, working the toe by alternating the two yarns as in two-end/tvaandstickning. I was very pleased with the result. Although it's still a solid color, the toes match the rest of the sock in texture and thickness.

Sensational Koigu Socks

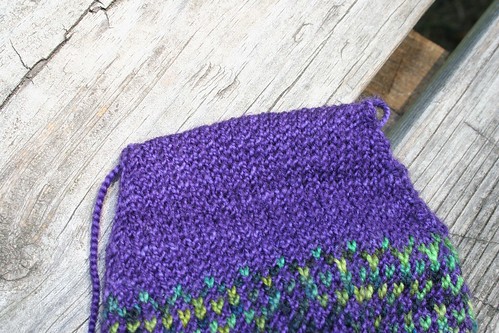
Speaking of toes, I also ran into a bit of a toe problem with the first sock. In the pictures, you can see the first sock as I originally finished it, worked with decreases every other round. For every other sock I've ever made, decreasing every other round has made a perfect toe. For some reason, though, my row gauge was considerably larger than I'm used to, and by the time the toe was more than long enough, I still had about twice as many stitches as I wanted. I went ahead and finished it, figuring I could knit the second sock while I was considering whether or not to alter the toe. I decided rather quickly that I didn't like the wide toe, so for the second sock I decreased every round. It came out perfect, so I cut the tip off the first toe, ripped it back, and re-knitted it the same way as the second.

Labels: ,

Friday, July 13, 2007

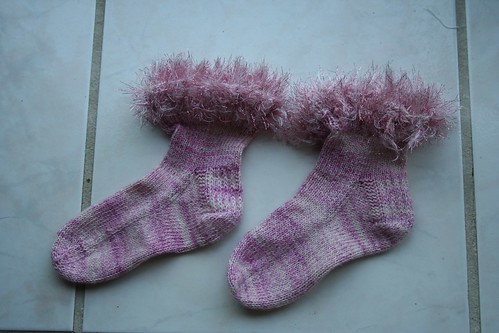
Boo's Sparkly Socks

Boo's Sparkly Socks

Pattern: Boo's Sparkly Socks.
Yarn: 1 100g/425m skein South West Trading Company Tofutsies (50% superwash wool/25% Soysilk fibers/22.5% cotton/2.5% chitin) in #730 (Light Foot). 1 87yd skein Lana Gatto Crystal (63% viscose/20% Nylon/17% Polyester) in #4112 (Pinks)
Needles: 2.5mm (US 1)
Gauge: 9 sts = 1"
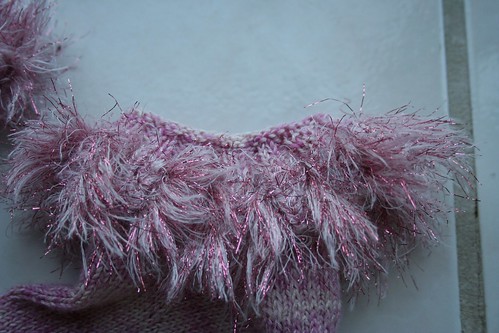
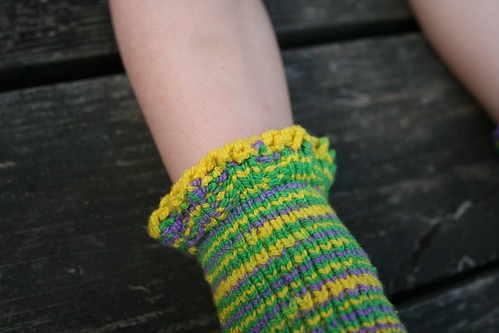
Notes: Flush with the success of the Fixation socks, I decided to make Boo a pair of pink socks. I showed her the pink yarn I'd bought, and she asked if it was "sparkly." I said I'd see what I could do. The next day, I went back to where I'd bought the Tofutsies, and found a matching pink eyelash yarn that certainly qualified as "sparkly." (And it was on sale.) So, I cast on more stitches than I needed, added the sparkly yarn, and ribbed the cuff in sparklies. After the cuff ribbing, I reduced the stitches to a more normal circumference and just knitted a basic sock. If I had it all to do again I might not double the yarn, and I almost certainly won't rib the eyelash parts, but the effect of the cuff was exactly as I'd hoped: big and floppy and foldable down to a nice anklet, but also capable of staying up.

Boo's Sparkly Socks

Boo modeling her socks.

Boo's Sparkly Socks

Close up of the sparklies, and the folded-down cuff feature.

Some more details about the pattern:

I cast on 64 stitches, because I wanted a big fluffy cuff that I could ruffle and fold down. I cast on with the main yarn (Tofutsies), then added the eyelash and knitted 6 rows of 2x2 ribbing with both yarns held together. 6 rows was enough to a) give a nice fluffy, sparkly cuff and b) drive me insane.

After dropping the eyelash, I knitted 5 more rows of 2x2 ribbing, then switched to stockinette and K2, K2tog around to reduce the 64 stitches to 48. After that, I just made a regular old sock. Well, with about two extra inches in the toe because Boo has long feet. I actually clipped the toe out, ripped back, and added an extra inch after finishing the first sock, because I realized it was just too short.

I really liked knitting with the Tofutsies. I'd heard it was splitty, and it was for a bit until I adjusted my stitch style. I was using Addi Turbos, which aren't particularly pointy (well, I don't think so, anyway :)), and I didn't have much trouble. The yarn knitted up into a beautifully soft and stretchy fabric, even at 9 sts to the inch. We'll see how it wears, but I liked the first impression.

Labels: , ,

Saturday, June 30, 2007

Fixation Socks

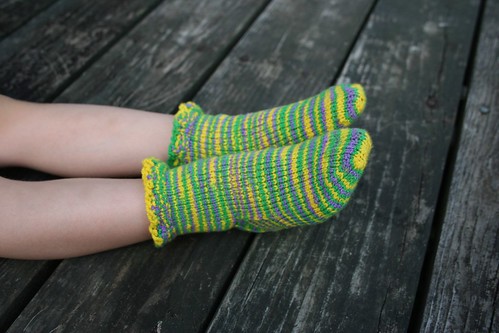
Fixation Socks


Pattern: Socks
Yarn: 1 50g/100 yd ball Cascade Fixation (98.3% cotton/1.7% elastic) in #9464. One ball actually made three socks, the two shown here and a *cough* rather smaller one. It was a swatch sock. Really.
Needles: 3.0mm (US 3)
Gauge: 7.5 sts = 1"
Knitting Time and Date Completed: Four hours each, completed 06/30/07
Notes: Although Boo's first socks were beautiful, they weren't exactly a success in the knittability and wearability departments. Knitting anything at 12 stitches to the inch is asking for a nervous breakdown, and after they were done Boo said the socks were "itchy." She loved them when she saw them, she really did, but she only wore them once before refusing to wear them again (cf. "itchy").

So, for my second attempt, I went with cotton, and I went with bigger yarn. Much bigger yarn. I used Cascade Fixation, which is cotton with a deceptively small amount of elastic blended in. It says 1.7%, but that 1.7% goes a long, long way. It's a very pleasant yarn to work with, soft and springy, but it took me a while to get the hang of what tension to use (for the record, really, really loose). It's very easy to have a lot of tension on the yarn without noticing, and I had to make a special effort to make sure that there was plenty of yarn pulled free and that I wasn't just stretching the same three inches of yarn over more and more stitches. But the results were very nice, and Boo loves them and declares them non-itchy. That's good enough for me.

Fixation Socks

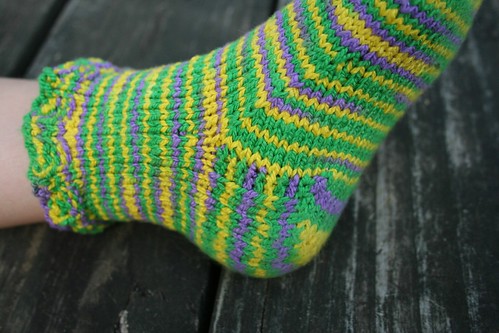
Detail of heel flap

I happened to be starting my heel flap at the same moment that I was sitting next to someone working from Charlene Schurch's Sensational Knitted Socks, and I decided to try the garter-stitch border for the heel flap. It worked up quite nicely, and I liked both the effect of the border and how nicely the stitches picked up.

Fixation Socks

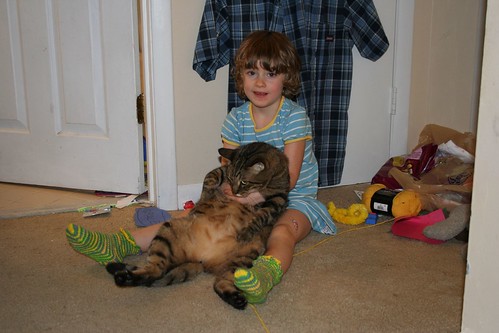
So, about the"ruffle"; at the top. This is not a ruffle, per se, it's actually just your everyday 2x2 ribbing that didn't rib because of the elastic. Presumably. But it looked nice, so I decided that it was a feature instead of a bug and carried on.

Fixation Socks

Poor Greebo. I really have no idea why he doesn't just run, run for his life every time he sees Boo coming. And yet, he will seek her out. Go figure.

Labels: , ,

Thursday, June 14, 2007

Two Weeks Later...

Harry Potter Scarves

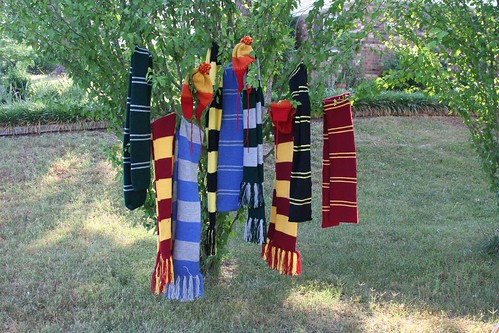
The final tally: 9 scarves, 3 hats. Not bad for two weeks work. :)

Labels: ,

Now We Have a Lawn Mower, Ho Ho Ho

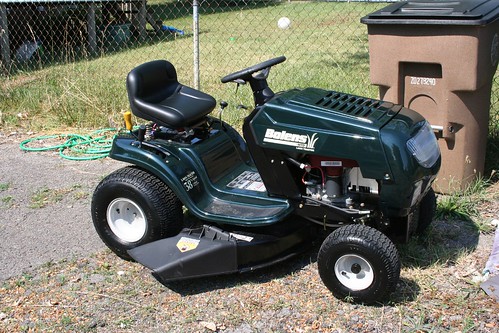
Lawn Mower

The lawn mower repair folks delivered our shiny new lawn mower this morning. They also installed the mulch kit, no charge. So, while losing an entire lawn tractor = not so good, replacing it with a brand new one definitely counts as a save in a customer service department. Plus, it's been so darn dry around here that we haven't even needed to mow for something like three weeks, so not having a mower hasn't even been much of an inconvenience.

In Hypericon news, I'm washing my pile o' Potter scarves in preparation for tasselling this afternoon. I have two ear flaps left to knit on my fourth Jayne hat, and I'm fairly certain I have enough yarn for a fifth, which I feel confident that I can finish during the con. I used Elann's Highland Wool, and it's actually not a bad yarn, especially for a project that's supposed to look rustic. And, when I mentioned here that I was waiting for yarn, the yarn was, in fact, sitting on my front porch at that very moment, so I was able to get started a couple of days earlier than I'd hoped. Cheap yarn delivered fast. :)

Labels: , , ,

Saturday, June 09, 2007

Jinjifore's Fourth Law of Knitting

Knitting Machine

The pile of scarves is bigger, but the bucket of yarn appears no emptier. Is this some kind of new knitting physics?

I've run off eight scarves on the machine now, two for each house. I'm making a third Gryffindor scarf because I ended up with one old-style scarf and one new for each of the houses except Gryffindor, and I'd like to keep the symmetry. Besides, the first scarf I did has all the expected flaws of a prototype, and I'd like to have two non-crappy scarves for each house.

I've ordered yarn to make some Jayne hats, but I have no idea if it will arrive in a timely enough fashion. In any case, I've met my minimum Harry Potter production goal, so that's something. :)

Six days to Hypericon!

Labels: ,

Monday, June 04, 2007

Harry Potter and the Knitting Machine

Allow me to present my life for the next two weeks:

Proto-Scarves

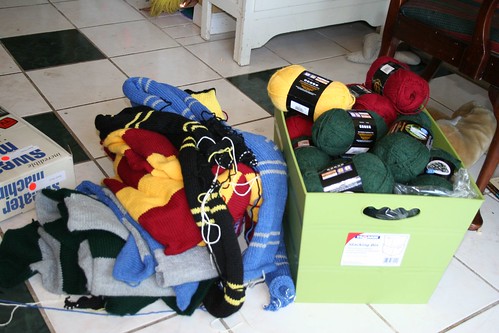
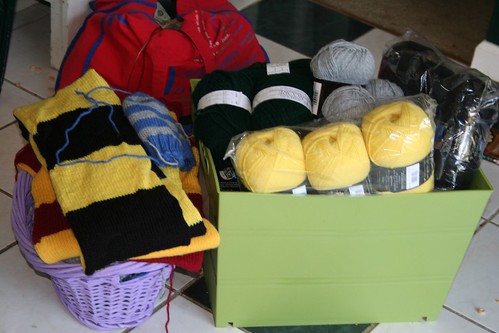
Hypericon is weekend after next, and my plan is to turn the contents of the big green bucket into scarves and hats before then. I've run off five so far, and number six is on the machine. (Actually, I'm making this post because my daughter complained that the machine was too loud. :))

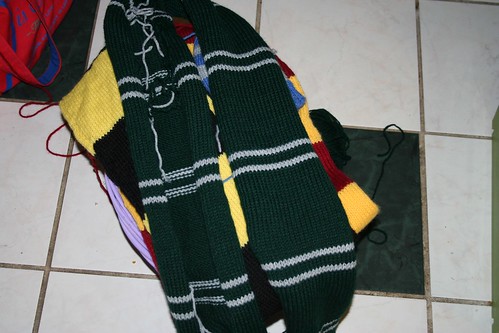
So far, I've made two Gryffindor scarves, one Hufflepuff, two Slytherins, and am mid-way through a Ravenclaw. Unfortunately, I used up all the Slytherin green I had, so if I want to make any more Slytherin stuff I'm going to have to re-scour JoAnn's and Michaels and other cheap yarn venues for dark green yarn. In retrospect, it might not have been my smartest move ever to make one of the nearly-all-green scarves from the third and fourth movies. But it is very pretty.

Slytherin Scarf

Well, it'll be pretty once it's seamed up. :)

My plan is to make at least two scarves for each house, and hopefully I'll be able to make some others based on the third movie design. It takes me about two hours to run off one scarf on my machine, and two to three more hours to do the seaming up. The seaming, though, can be done in spare moments, whereas getting blocks of time to use the machine are more of a challenge.

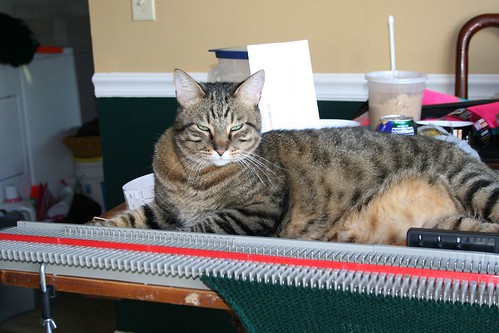
Greebo is a big help with this:

Knitting Machine With Greebo

Labels: , , ,

Thursday, May 31, 2007

Welcome to the Machine

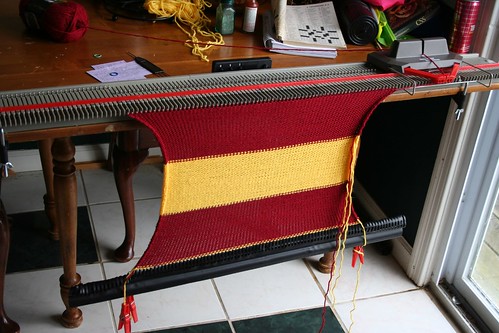
Some folks have asked about my humble knitting machine, so I've taken a few pictures. There are more pictures here, and if you click on the pictures in this post you can read notes about the various parts of the machine.

Knitting Machine

This is a Bond Sweater Machine. (A very old one, I might add. I bought it probably ten years ago.) It's the simplest, most basic type of knitting machine, with only one bed and a manual carriage. The single-bed part means that it can only do knit-based stitches, no purling. This machine has a 30-needle expansion bed on it, which means it can knit up to 130 stitches at a time. It takes something like four feet of machine to create two feet of knitting, so yeah, it needs a lot of space.

Knitting Machine

Here's a picture of The Machine In Action. You can see here why the darn thing has to be so long, because the knitting needs to be under a lot of downward tension to make it hang from the working needles and not just pop off. The scarf in this picture is 70 stitches wide, a little more than half the total capacity of the machine. This is about 90 rows of knitting, and took about 10-15 minutes. When I get a good rhythm going, I can average an easy 10 rows a minute.

Knitting Machine

A look at the machine mid-row. I took the pictures on a color-change row so you could see how the new, yellow yarn is working into the old red yarn.

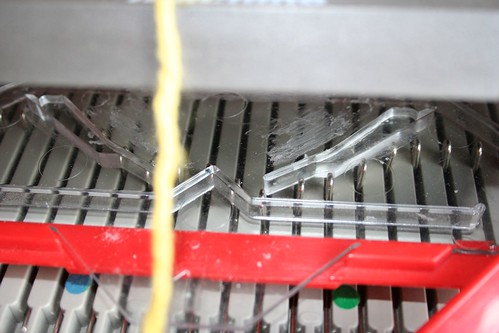
Knitting Machine

The nitty-gritty insides of the carriage. In this picture, the carriage is moving from left to right, and you can see how the ridges of the template are pushing the needles back and forth. As each needle moves forward, the old loop of yarn is pushed back over the latch, opening the latch and leaving the hook ready for the new yarn. As the needle is pushed back, it carries the new yarn, and the whole hook is pulled through the old loop, leaving the new loop of yarn resting in the hook ready for the next row.

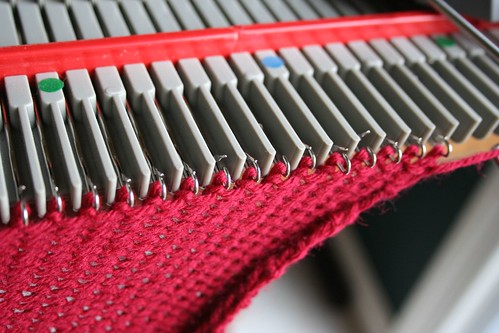
Knitting Machine

A closer look at the knitting, and the latch construction on the needles.

Well, there it is, the knitting machine in all its glory. :)

Labels:

Friday, May 18, 2007

Swatching, a Cautionary Tale

While I was taking pictures and uploading and making notes, I decided to take a photograph that vividly demonstrates the importance of washing one's swatches.

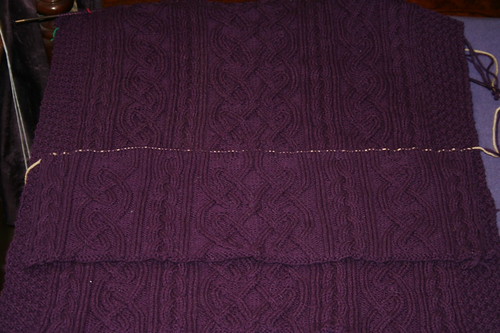
Brigid back and swatch

In the picture, the smaller piece is the aforementioned swatch, laid on top of the in-progress back of the sweater. As you can see, there's a dramatic difference between the washed swatch and the unwashed sweater piece, to the tune of 3 1/2 inches extra width. (Don't worry, I knew this before I cast on the sweater, and the in-progress piece will be the correct size post-blocking. I hope.)

Now, I will admit that I'm not the world's most diligent swatcher. There are, really, only so many times that one can swatch the same yarn on the same needles and come up with the same result before giving up swatching every single time. I'll also admit that I'm fairly lax about washing and blocking my swatches. If it's a yarn I've used before, a stitch I've used before, and a project where the fit is negotiable, I don't always wash and block. At least, I didn't used to.

This time, however, I knew that the numerous cables would play merry hell with gauge, and I was also going to have to re-tool the pattern to make it fit me. Alice Starmore notoriously includes excess ease in her patterns, but even her generous largest size wasn't big enough for me. So, I knew I needed a big swatch, and I knew it would have to be an accurate one.

I turned, therefore, to some advice from Elizabeth Zimmermann, from Knitting Without Tears. In it, she suggests making a "swatch hat" for complex cabled patterns, especially if one is creating one's own pattern combination. The idea is to knit a swatch half the circumference of the sweater, which generally falls into the range of a typical hat circumference. Not only do you get a very accurate swatch out of it, you get a matching hat for your sweater. So, after making yarn calculations, I ordered quite a bit of excess yarn and included an allowance of one skein just for swatching.

As I was working on the swatch pictured above, I was thinking only in terms of figuring my gauge across all those cables. I hadn't really thought about washing and blocking the swatch yet. Then I saw a sweater that a lady had knitted based on a washed and blocked swatch. It fit her beautifully...until she washed and blocked the full sweater. She had swatched the cables and blocked them, but the ribbing bloomed hideously on the final blocking, and the sweater no longer fit. So, when I finished my swatch, I washed it and laid it flat to dry. I didn't stretch or pin it, just laid it out, let it dry, and then gave it a couple of days to relax back into whatever shape it wanted.

It wanted, apparently, to be 3 1/2 inches wider.

I like a lot of ease in my clothes. But no so much that 7 extra inches, added on top of the generous ease I was already planning, would have made the finished product look like anything other than an intricately cabled tent. I dodged the bullet mostly by accident, and I'm just grateful that I decided to be diligent.

Labels:

Photograph Upload

I've just finished a massive upload of photographs to Flickr. There are a lot of new pictures of Boo and my friends and family, but I've also put up just about every picture I've ever taken of my knitting.

Jinjifore's Photographs on Flickr

If you want to look at pictures of people and animals, you can visit the "People, Places and Things" collection, which you can also get to by clicking the icon to the right of my main page on Flickr.

If, on the other hand, you'd like to look at thrilling knitting pictures, visit the "Knitting" collection.

There are several subsets in each category that will, hopefully, be self-explanatory. I've also tried to tag the pictures with years and subjects. In the knitting pictures, the "Project Main Entry" tag is used for the picture that has the complete notes for that particular project.

Labels: , , ,